Dockerizing a CTF
Backdoor is a long-lived Capture The Flag style competition run by folks at SDSLabs. For the uninitiated, in Capture The Flag (CTF) style events in network security, participants have to solve questions in various categories like cryptography, web, binary exploitations etc. Backdoor hosts CTFs from time to time having duration ranging from 6 hours to 1 day.
On the basis of how challenges are presented on Backdoor, there are two broad categories:
-
Webpage-based (hereafter referred to as
publictype): These challenges are accessible from a web browser. Example: JUDGE, MEDUSA. -
Interactive challenges (hereafter referred to as
scripttype): These challenges are accessible over netcat. Example: CLOSED, RAPIDFIRE
Then there is the third type where the challenge requires both types. Example: TEAM.
Previous architecture:
The public-type challenges were served by an Apache server running at http://hack.bckdr.in. The script-type challenges were run in chroot jails and served using the xinetd super-server. chroot operation is used to mimic the current directory as the root directory of the system ([change]root). More can be learnt about this from this post by Dhaval Kapil.
Problems with the previous architecture:
For public-type challenges, the same structure has been retained. Earlier, all challenges had the same virtualHost but now each challenge has its own. This was done to better implement challenges that required custom rules or a custom domain name.
Script-type challenges, however, had some major problems:
- The aim is to run all script-type challenges in chroot jails but adding new environments to the jail is a huge pain.
- There is a big problem of redundancy. Because each challenge runs in a separate jail, each of them had their own copy of the necessary environment. This can be solved by creating a common jail for all challenges but that puts other challenges at risk in case one of them gets compromised.
- Automated monitoring of challenges’ deployment status is not easy because there is no standardization.
- Deployment takes up a lot of time. Shifting challenges from one machine to another and ensuring they work fine required a lot of manual labour given that we have 70+ challenges and many of them require an elaborate setup.
Tackling the problems:
Initially, I started working on problem 4 but figuring that out was turning out to be difficult because of no standardization in the challenges. It was obvious then that a structure was necessary. I came across Docker while searching a solution and after some time, it became the obvious choice.
How Docker solves these problems:
The description on the Docker website reads:
Docker allows you to package an application with all of its dependencies into a standardized unit for software development.
And that’s precisely what we need!
- Setting up a new environment is as easy as
docker pull pythonwhich effortlessly sets up a python image for us. And we can make our own Docker images to be used and combined with other images. - Each Docker image consists of a series of layers. Docker makes use of union file system to combine these layers into a single image. These layers are where the magic lies. If you want to update an image, instead of updating the whole image, only the relevant layer is updated. And these layers can further be used to stack images one over the other! So we can just build a python environment once and use the same for building secondary layers without redundancy thus solving problem 2.
With the major problems sorted out, lets look at the new architecture.
The new architecture:
The flowchart below explains how we build layers upon layers to reduce redundancy.

First we build an image hack-base that is based on an Ubuntu 15.04 image itself. We use this image to install various packages that will be required by multiple challenges and thus reducing redundancy. We follow the same approach as we move up the chart. We make separate images for each type of primary environment (nodejs/python etc) and further build an image for each challenge + images for any external dependency they need (like redis/mongodb). Then we create what are called containers that are instances of the challenge images and link containers of external dependencies, if any. Its worth noting that the user cannot modify the image itself. The user is provided with a writable layer over the container. You may as well run rm -rf /* in an Ubuntu container and it will delete all your commands and system files but only from that instance. So you can just close the container and spin up one more in less than 2 seconds and whamm! you get the vanilla system back!
As for the networking to and fro from the container, we have to expose the ports that we want to map to the system. Say if a challenge based on python listens on port 8999, we expose this port from within the container and map it to a port on the system (usually the same as the one in the container). The Docker documentation provides good examples for this. Then we use the xinetd super-server to listen to the requests to the specified ports and spin up a disposable container accordingly.
The deployment tool:
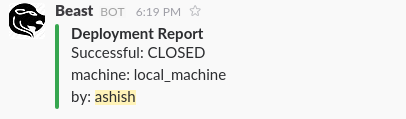
To solve problem 4, we created a tool named Beast. Beast is written in python and performs all the tasks from syncing the challenges with the production server to building the challenge images and setting up the xinetd service. It can be used to deploy challenges locally or to multiple remote machines at once. After any action is performed, our Slack channel receives a notification from Beast about the deployment.
Beast also monitors the resource usage of running containers using google/cadvisor and raises an alarm if something looks bad. It also exposes an API to check the challenge deployment status.
One important feature of the new architecture is the standardization it brings. Now each challenge specifies a setup file that is used as a deployment guideline by Beast. Let’s take a look at a sample challenge pytest that is a mixed type challenge. The setup file for pytest is shown below.
1
2
3
4
5
6
7
8
9
10
11
12
13
14
15
16
17
18
19
20
21
22
23
24
25
26
27
28
29
30
31
32
33
{
    "challenge_name": "pytest",
    "public": [
        {
            "public_dir": "./public",
            "public_setup": [
                {
                    "script": "public_bash.sh",
                    "sudo": "yes"
                }
            ]
        }
    ],
    "script": [
        {
            "script_dir": "./scripts",
            "env": [
                {
                    "primary": "python",
                    "version": "2",
                    "executable": "yo.py"
                }
            ],
            "port": [
                {
                    "xinetd": "yes",
                    "outer-port": "8049"
                }
            ]
        }
    ],
    "dev_file": "CHALLENGE.md"
}
The keys used are self-explanatory. Note that the challenge creator can also specify bash scripts for elaborate deployment (like if some challenge requires composer install).
Here is a sample of how the tool works:

What’s next?
We have some really cool ideas in store for Backdoor in the coming months. Stay tuned for more!
